Natural Wool Insulation Install Process
Installing NATURAL WOOL INSULATION by Wool.Life is an easy and safe process whether you do it yourself or through a contractor. There is no risk involved in the installation of the product, no toxic off-gassing like spray foam, no boric acid like cellulose and other wool products, and no fiberglass particles suspended in the air.
PURE WOOL INSULATION is manufactured into air-capturing knops (small balls) to give it the elasticity that it needs to resist slumping. These small balls are designed to be blown into attics and walls, and because wool is a natural fiber, there is no need for any protective clothing, eye protection, or breathing apparatus during installation.
For the DIYer it can be blown with a common garden vacuum/blower and 3″ hose. For higher productivity for professional installers, commercial industrial vacuum blowers are excellent for installation. We are happy to walk you through the installation process with helpful tips, links, and videos.
1.- Measu re and Calculate the square footage for the area you want to insulate
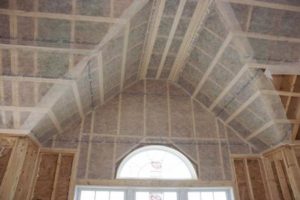
2.- Install a Fabric Mesh on the walls and/or Attic Rafters.
3.- Blow your PURE WOOL INSULATION into the cavity between the mesh and your sheathing.
The insulation values resulting from the installation of Wool Life Products Pure Wool Insulation depends on the thickness of the installed product.
In Attics
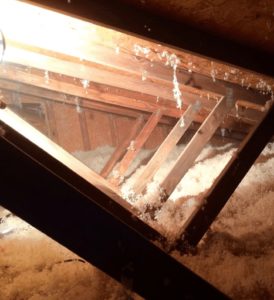
Installing Pure Wool Insulation in the attic is a Simple process, all you need is a regular leaf Vacuum/Blower like the one shown in our video. Install Loose Fill Natural Wool Insulation evenly throughout your attic by blowing it in.
Prior to installation, we recommend that you follow these guidelines:
- Safety checks – secure and prepare the installation area, making sure that all downlights are covered
- Measurements – approximate amount of insulation needed
- Preparation – ensure you have the necessary tools
Recommended items for use during installation in a typical project:
- Ladder
- Portable lighting
- Tape measure
- Height indicators
- Light covers – prevent the over-heating of down-lights and other electrical fixtures
In Walls
Installation in Walls is done by first installing a Fabric Mesh stapled to rafters. You can use a hammer stapler or a pneumatic stapler to make it easier and faster.
Prior to installation, we recommend that you follow these guidelines:
- Safety checks – secure and prepare the installation area
- Measurements – approximate amount of insulation needed
- Preparation – ensure you have the necessary tools
Recommended items for use during installation (if applicable):
- Pneumatic Stapler
- Ladder
- Portable lighting
- Tape measure
- Wool Life Products height indicators
- Light covers – prevent the over-heating of down-lights and other electrical fixtures